Light Weight Fully Adjustable Watercolor Easel
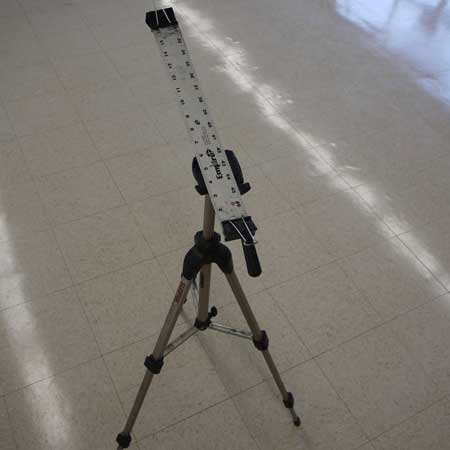
1. Purchase a Sunpak 620-020 Tripod (From Amazon) $20 or under
2. Find and purchase a rafter’s square or ruler made of aluminum.
(I USE THE Empire 48 In. x 2 In. Aluminum Straight Edge, Item number: 6664213 from Orchard), 8.95
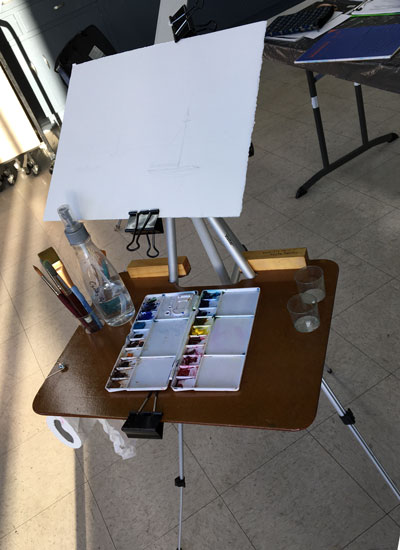
3. I use the Grafix 16-Inch by 24-Inch Incredible Art Board from Utrecht. This works with ½ sheet watercolor paper. To protect the board I tape the edges.
4. Bolt nut and washer, 10-32 x ¾ Flat machine screw with nut and washer.
5. Cut the scale or ruler off to be 16.5” long. Drill a 3/16” in hole 1/3 from the end. I use a counter sink bit.
6. The tripod comes with 2 quick release attachments. Punch the wingnut out of one (keep the other for your camera).
7. Attach the quick release to the straight edge you have cut, the flat end of the bolt on the side that is counter sunk with will be next to the board. Use a nut and lock washer and tighten up. Lock the quick release to the tripod.
8. You now have a light weight fully adjustable watercolor easel. Use clips to attach the board to the straight edge. Use clips to attach your ½ sheet paper to the board.
(Pictured is Slik 2001 easel which is identical to the Sunpak 620-020)
Here is a verson of a setup by my frend Cyndy:
David Peterson
916-716-5951
http://www.aquarellist.com
email: aquacolorist@yahoo.com
Download a PDF |